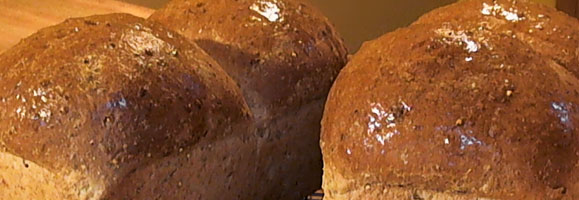
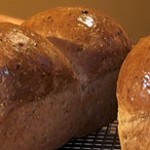
This homemade bread is nutritious and delicious and it only takes half the rising time of regular breads. We have added a number of different seeds to make a variation on whole wheat bread that is absolutely delicious. It is a hearty bread that is great to eat anytime and makes excellent grilled cheese sandwiches!! Go ahead…give it a try!!
In the video, I mention the window pane test. This is a great method for anyone who is new to bread making to test the consistency of your bread when kneading. It will allow you to tell when you have kneaded your bread enough. You can see my demonstration video of the window pane test here.
Directions:
Yield: Two loaves
- Put two cups of whole wheat flour, two cups of all-purpose flour, shortening and yeast in large mixing bowl. Blend together with wooden spoon or plastic bench scraper to break up the shortening.
- Add the cornmeal, oat bran, sunflower seeds, millet seeds and flax seeds.
- Heat the molasses slightly and mix with the warm water. Add to the dough mixture and mix together.
- Add another 1/2 cup of whole wheat flour and the salt. Blend together.
- Dump the contents of the bowl onto the counter and continue to blend by hand.
- Knead dough for 10 minutes adding flour as needed, until you have a nice smooth ball that is no longer sticky. You may notice that the millet seeds will roll out of the bread as you’re kneading, but you can just knead them back into the bread as they fall out. It is also slightly harder to tell when the dough is ready because of the seeds, but you can still use the window pane test to gauge whether your bread dough is ready or not.
- Because we used the quick rise yeast, we will just leave the bread to rest for approximately ten minutes before we shape it into loaves. This will take the place of the first rise in the normal bread making process. If you use regular yeast, you will still need to let it rise until double in size (approx. one and a half hours) before shaping into loaves.
- Place the bread dough in greased 8″ loaf pans and lightly grease the top with shortening. Cover with a clean towel and allow to rise in warm, draft free area for approximately one hour, until double in size. The time to double in size can change depending on the warmth of your kitchen, anywhere from 30 mins to an hour and a half so be sure to check the bread occasionally.
- Remove towel and place in preheated 400°F oven, center rack, for 30 minutes. Remove from oven and pans. Brush crust lightly with butter or margarine and cool on wire racks.
ENJOY!!!
Ingredients:
- 2 and 1/2 to 3 cups of Whole Wheat Flour
- 2 cups of White All-Purpose Flour
- 2 tbsps of Fleishman’s Instant Quick Rise Yeast
- 1/4 cup of Shortening (Room Temperature)
- 1/4 cup of Cornmeal
- 1/2 cup of Oat Bran
- 1/4 cup of Sunflower Seed
- 1/4 cup of Millet Seed
- 1/4 cup of Flax Seed
- 1/4 cup of Molasses
- 1 tsp of Salt
- 2 cups of Hot Water (100°F)


Hi! Chandra,
Thanks for the reply. I usually put the bread in deep freezer. What do you recommend to use to wrap up the bread before putting in deep freezer? Aluminium foil or cling flim and with sealed plastic bag?
I find the homemade bread texture turns better after toasting as texture is much lighter after toasting. Is that usually the case?
Hi Lee Min,
Make sure your bread is completely cooled before wrapping and freezing. Also make sure you take all of the air out of the bag before freezing.
Are you putting your bread in a deep freezer of the freezer in the top of your fridge?
I find that I get better results with the deep frezer.
Thanks for writing 🙂
Candra
Hi! Have made this bread and it turned out great. The texture was not as heavy as I thought. Would appreciate your tips as the bread is much drier and heavier in texture after freezing. Thanks.
Hi Frank,
Yes you can use a mixer with the dough hook attachment or a food processor if you don’t want to knead by hand. I would knead with the dough hook for the same amount of time. You can always perform the window pane test if you are unsure. Hope this helps! Thanks for watching 🙂
Candra
Instead of hand blending and kneading, can you do this with mixer with the bread knead attachment? If so how long?
[…] Hearty Multigrain Seed Bread « Cooking With Candra […]