
Halloween is one of my favorite times of the year, so mom (Candra) let me do another video for her channel to celebrate. I decided to make and decorate some cookies. I love the flood icing, or flow icing as it is sometimes called, because it makes such a nice finish.
I use some of mom’s (Candra’s) recipes to make these cookies:
Royal Icing
Shortbread Cookies
I hope everyone enjoys getting creative and making these cookies. Happy Halloween!
Directions:
Yield: Two Dozen Cookies
- Start by making the shortbread cookies, except instead of heart shaped cookie cutters, use Halloween shapes (recipe here). Let the cookies cool completely before using.
- Make royal icing (recipe here). This will give you enough royal icing to make eye decorations, pipe the borders of your cookies and make your flood icing.
- First we will make the eye decorations. Take a small amount of the white royal icing and place in a piping bag with a small round tip (#5 tip). Pipe small circular dots onto a sheet of parchment paper. I made about 60 eyes, which allowed me extras to give the cookie creatures three or four eyes if I chose.
- Separate a small amount of royal icing (about 2 tbsps) to mix with the black concentrated gel coloring. Add coloring using a toothpick, a small amount at a time. Mix after each addition until you reach the level of black you want.
- Fill the black royal icing into a piping bag. This time we will be using an even smaller tip (#3 tip). Pipe a small black circle into the center of the white dots from earlier to complete the eyes. Let the eyes dry and harden for approximately 1 hour before handling.
- Now we need to pipe a border of royal icing around the outside of the cookie. This will hold the flood icing in place and prevent it from running off of the cookie. Separate some royal icing (about 1/4 cup) and add the desired gel coloring, as earlier with the black. Fill into a piping bag, again with a #3 tip, and pipe on top of the cookies, following around the outside edge.
- Make flood icing by adding water to the royal icing. Add 1 tbsp at a time, mixing after each addition of water, until you reach the desired consistency. Watch the video below for the best description of making flood icing.
- Add your desired gel coloring to the flood icing, as before.
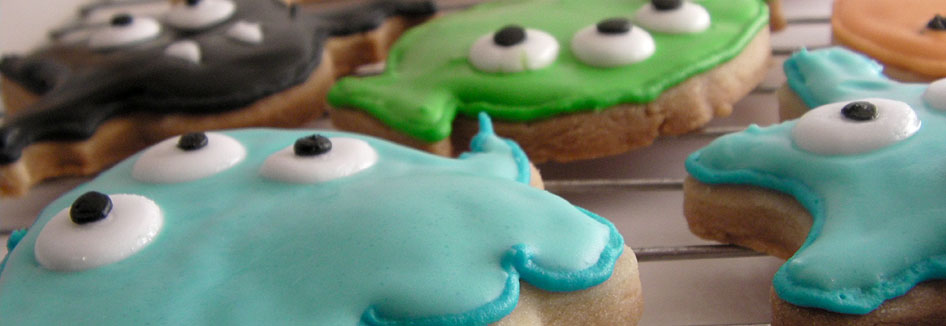
- Place the flood icing into a piping bag. Roughly fill in the bordered area on the top of your shortbread cookies. The icing will do most of the work for you by flowing and settling for a nice smooth finish. But if you have some areas that aren’t filled in, coax the icing into those spots with a toothpick.
- While the flood icing is still wet, add some of the eye decorations onto your cookie. When the flood icing hardens, the eye decorations will be stuck to the cookie.
- You can eat the cookies right away. But for those cookies that don’t get eaten immediately, be sure to store them in an airtight container. Do not stack them on top of each other until the flood icing has completely hardened (app. 24 hours).
Don’t stop at Halloween with these cookies. You can use different cookie shapes and icing colors to make all kinds of creations. Try making Christmas trees with green icing and royal icing decorations, or hearts for Valentine’s Day. And who says you need only make these on special occasions? There are a number of great everyday cookie cutter shapes, like butterflies or flowers. Get creative!
Ingredients (Shortbread Cookies):
- 1 and 1/2 cups of Butter, softened to room temperature
- 1 cup of Icing Sugar, sifted
- 1/2 tsp of Vanilla
- 3 cups of All-purpose Flour, sifted
Ingredients (Icing):
- 4 cups of Icing Sugar
- 3 tbsps of Meringue Powder
- 6 tbsps of Water
- Concentrated Gel Food Coloring


Comments